Thursday, July 30, 2009

CC229, SC239, WT229: Official Snail Mail!!!!


Here is a quick card I made this morning for the challenges this week -- first, the color challenge (pixie pink, celery, apricot), then the sketch challenge, and finally the ways to use it challenge (office supplies)....so the official count is THREE! (CC229, SC239, WT229).

I used a white base, the pixie pink layer is dry pressure embossed with swiss dots and the apricot panels are dry pressure embossed with spots & dots. Distressed all edges.....official snail mail stapled to the main image (using an office supply). There is appletini green and rockin pink sparkle fluff on the card too! The pink sparkle fluff is on the flowers (by the mailbox) and on the mail pouch....the green sparkle fluff is on the back of the snail....


stamps: Snail Mail {Our Craft Lounge}
ink: copics, black soot {Ranger}
cardstock: Pixie, celery, apricot, white
misc: sparkle fluff {Our Craft Lounge:appletini green and rockin pink}, CB {swiss dots, spots & dots}, staple

Wednesday, July 29, 2009

A really AWESOME project....if I do say so myself....


So this is a little project I worked on for a friend from church. The project is for her husband for his birthday. The little figurine (Einstein) went up in the March, 2009 Space Shuttle Discovery
mission trip. It was flown for the family by one of their family members. I created this shadow box for the figurine with the certificate of authenticity. It was so cool to hold something that went up in SPACE!

I cannot wait to hear the husband's reaction!!!

Finished size is 12x12....


Papers: Creative imagination (Michaels)
misc: shadow box


Saturday, July 18, 2009

Happy Birthday Genevieve!


The Whispy Blooms set from Our Craft Lounge spoke to me the other day...made me think of my hydrangea that I have in the back yard (note to self -- get some of that aluminum stuff for the soil).


I decided to create a card with the flowers and chose a clean look for the card - the white card base has a swiss dots dry embossing on the background. I stamped the flowers, trimmed them, colored them in with copics and then added them to a white circle base with foam dots (punched with a circle punch). I mounted the circle atop a scalloped circle celery. The sentiment is printed on cardstock and punched with a word window punch. A simple ribbon (mayarts) knot around the whole card.


{Whispy Blooms} Our Craft Lounge
paper: white, navy, celery
ink: black soot, copics
misc: ribbon, swiss dots, punch, stickles, word window punch


So my baby turns two on Sunday....I cannot believe that it has been two years....


Here she is the day she was born....

Same day as her Grandmother (who passed away in 1999)....


She still has a hint of that black hair! Just a whisp on the ends...


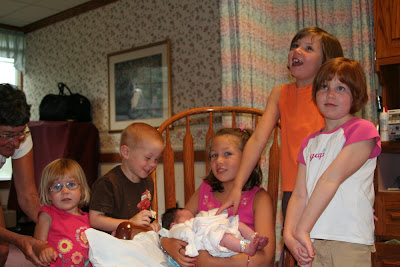
Here is my first photo of the six pack....


Todd and I with our baby!


This was my favorite photo of that day -- Karen was SO thrilled to be a part of Genevieve's birthday -- and just fell in love the moment she saw her!


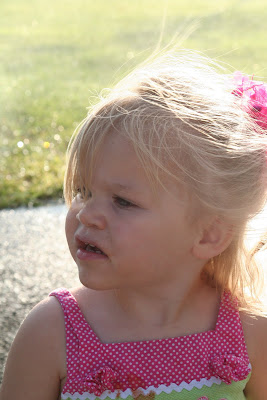
Here she is at one year! Her hair turned brown and she was so full of love and laughter! She is actually wearing my dress that I wore on my first birthday!

She spent the first few months of her life in hip braces! I was amazed that she crawled and walked right on track!


Enjoying her cake last year! She LOVED it!


Now she is so grown up compared to last year. She is giggling and talking and running and keeping up with her fantastic five siblings....

Happy Birthday Teto!


FS128: Minnidr


This week's featured stamper is Minnidr. I chose Diane's Kind Thoughts & A Bug card. I changed the stamp set and the colors. I also added a button instead of a bug!

I used a white base, with a black layer on the base of the card, then a layer of some really *FUN* designer paper (Costco My Minds Eye/Wild Asparagus pack). The stamp is Snail Mail from Our Craft Lounge.

I stamped the images with Ranger Black Soot ink and colored them with copics. The button was lying on my desk. Maybe I was supposed to sew it on someone's shirt? I found it -- so it's mine! I threaded some May Arts ribbon and added the button to the corner with some foam tape. The image was colored with copics. The birthday cakes are tiny little cupcakes from the Snail Mail set. I attached them to the main image with foam tape. I added some stickles to the snail "trail" and the flame on the cupcake candles. I also added the stickles to the swirl of the snail shell.

This cute little card is for Evan and Sean -- just a little late (thus, the sentiment!)....

stamps: Snail Mail {Our Craft Lounge}
ink: black, copics
paper: black, white, designer paper
misc: button, stickles, ribbon, foam tape


Leah's stuff!


Here are some of the things I made for Leah (Karen's friend who is turning eleven) for her birthday. The first is a small pig which I colored with copics (with Leah's favorite colors -- green and turquoise). I used copics to make dots on the pig and then used the copics to color the lace! I wrote Leah's name on the other side of the pig, but I hate my handwriting -- so I am not sharing! :) I love the lace skirt - which looks SO adorable in real life!

I also made a journal for Leah using Papertrey Ink's Friends Till the End stamp set. It was easy to create this journal with a little ink and some ribbon. The front window has Leah's name with the Trajan alphabet set. What is nice is the front window is a pocket, so she can slip in a photograph and personalize the journal for her end of the year fifth grade photos and entries....

This kraft journal was a leftover in my supply closet -- a target dollar spot purchase ions ago!

I used a rubicoil coil from my stash -- it is a turqoise blue!


Pig:
ceramic pig, copic markers, lace

Journal:

Stamps: Friends Till the End and Trajan
paper: green (SU!)
ink: white, new leaf (Papertrey)
ribbon: Mayarts, coil (rubi)


{edit to add: I got these little pigs at the Target Dollar spot -- but I think you could see if Oriental Trading company had them. For anything permanent, please use a clear spray to seal your creation. Just test the copic with spray first, to see if it runs.}

Friday, July 17, 2009

Such A Busy Summer: Walking with Dinosaurs...


There has been *SO* much going on since June that I feel like I could hardly breathe, let alone craft and create! On June 21, we went to Walking with Dinosaurs with the kids...it was Father's day, and Todd didn't mind one bit. The kids *LOVED* it and I thought it was such a GREAT production!

It was amazing to me that they put together such a FINE show and were able to keep *EVERYONE* just mesmerized throughout the show....

It was really REALLY loud, so if you are planning on going, keep that in mind! Xavier got a t-rex haircut just for the occasion!

He also brought Olive, his stuffed t-rex along. He said, Olive misses his family and wanted to see them....

Todd and I love watching the kids faces as they see something new and fun......and let me tell you, the kids were just AMAZED. Sometimes I saw Xavier burying his face in Olive during a particularly loud scene!
Even Karen and Victoria gave the show a good rating!

I will admit, I could see it being a nightmare for any child who had a fear of dinosaurs....the animals were SO lifelike and the Brontosaurus appeared to be able to reach down and touch us!

How can we possibly top this for Father's day next year???


Sunday, July 12, 2009

A hard decision....

After unsuccessfully trying to juggle so many things this summer, I have decided to take off the rest of the summer from my blog banner and watermark design work. I am trying to spend time with the children, work on my craft critique articles, create projects for Our Craft Lounge and work on Papertrey Ink stamp designs. I will re-evaluate my design work in the fall. Please understand that this was a tough decision for me and I would love to help everyone out, but I just do not have enough hours in the day. My family is my top priority and will always be my top priority!

Thank you for understanding!

Saturday, July 11, 2009

FS127: Meow, ME WOW!!!!

I had a birthday party to go to with the kids today! Max, this ADORABLE little man from our neighborhood is turning 3 and the younger three kids went to his airplane themed party. His mom is so creative, she made airline tickets for the invitations -- had adorable barf bags for the goodie bags (with goodies, not barf)....had an airplane cake, foam airplane toys....just cute stuff!

So I made this card to go with the gift. It is based on Kelly's card {Sending my love}.

changes:
*colors
*stamp set
*I used wide brown grossgrain ribbon, not sheer ribbon
*I used a scalloped circle
*added buttons
*moved sentiment

This is old SU! designer paper which I had in my stash. I used foam tape to adhere the buttons. The image is stamped with black soot (Ranger) and colored with copics. Sentiment printed on the computer, then trimmed. Main image and sentiment sponged with walnut ink. Simple card for an adorable boy!

Stamps: Our Craft Lounge: Boy's Toys
Paper: White, designer paper (SU!)
ink: black soot & walnut (ranger), copics
misc: buttons, foam tape, ribbon (Mayarts/starlitstudio), scalloped circle punch


Sunday, July 5, 2009

FS126: Not a B-gin-r


This is a card I made based on Sandra's card {welcome little one}. I changed the colors and the stamp set. I loved the angle of the main image so I decided to give it a whirl. I liked the look of the brown and blue, but felt this card needed to be more patriotic!

I started with some kraft cardstock. I used some cranberry cardstock, dry pressure embossed with the swiss dots folder, then I used a piece of textured blue at the angle. Instead of the ribbon, I used the stamped piece of flag. I colored the flags with copics, trimmed them and added them to the card. I added some of the WT225 "Out of the Box" cardboard (using the star punch, I created a star, sponged with walnut stain and spritzed with walnut gold glimmer mist.) I put a button with ribbon threaded through it on the star with some foam tape. Main image colored with copics and sponged with walnut stain.

Happy 4th of July (well, now it's the 5th)....

stamps: Let Freedom Ring {Our Craft Lounge}
paper: kraft, cranberry, white, blue (textured), corrugated cardboard
ink: black, copics, walnut stain
misc: swiss dots cuttlebug folder, tattered angels glimmer mist (walnut gold), buttons, mayarts ribbon, foam tape, punches (marvy)


Thursday, July 2, 2009

WT225: Feeling Patriotic


With family visiting for the upcoming holiday, we have been out visiting historic sites in Saratoga the past few days. This morning, I had a few moments to stamp and was able to create a cute Patriotic card. I used the Our Craft Lounge Let Freedom Ring stamp set. Oh man - this is a FUN one to color! I also participated in the WT225 Out of the Box challenge on Splitcoast. You were to use corrugated cardboard on your card. I know you cannot see how beautiful this shines in the photo, but the cardboard was spritzed with gold tattered angels glimmer mist. It sparkles so nice! It was hard to adhere to cardboard efficiently to the card because the riding hood red layer was dry pressure embossed with the swiss dots folder. There are some misc. buttons on the bottom of the card. I hope to play more later....maybe another Out of the Box challenge.

Tonight was supposed to be the first swim meet for the kids - we rushed back from our tour of Phillip Schulyer's mansion in Saratoga for the meet, only to have it cancelled. It has been raining so much here in Upstate New York, that it feels more like Forks (I am waiting for Edward to emerge from the field in the back yard, or maybe see Jacob lurking in the woods by the side of the house)....ahhh! A girl can dream....


stamps: Let Freedom Ring {Our Craft Lounge}
paper: Riding hood red, white, blue (textured), corrugated cardboard
ink: black, copics
misc: swiss dots cuttlebug folder, tattered angels glimmer mist (walnut gold), buttons, mayarts ribbon, foam tape, punches (marvy)


blogger templates | Make Money Online